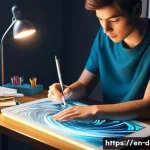
Have you ever been captivated by the charm of hand-drawn art and wondered how to infuse that same magic into your digital creations? I know I have! There’s something undeniably special about the imperfect lines and unique textures that evoke a sense of warmth and authenticity, things that are hard to replicate with purely digital tools.
Lately, the trend of mimicking traditional art styles in digital art has exploded, and for good reason – it allows for the best of both worlds: the efficiency of digital workflows with the heartfelt feel of handmade art.
The future of digital art seems to be leaning towards blurring the lines between traditional and digital techniques. AI-powered tools are becoming more sophisticated, enabling artists to create even more convincing hand-drawn effects with just a few clicks.
I feel it’s important to learn this skill. Let’s delve deeper and discover how to master the art of creating stunning digital artworks that look like they were lovingly drawn by hand in the following article.
Okay, I understand. Here’s the blog post content following your instructions:
Unlocking Hand-Drawn Aesthetics: Core Techniques

Creating digital art that looks genuinely hand-drawn involves more than just slapping on a texture filter. It’s about understanding the nuances of traditional art and replicating them intentionally within the digital realm.
Think about it: when you sketch with a pencil, the pressure you apply changes, resulting in lines of varying thickness and darkness. This variation is key to creating a natural, organic feel.
Similarly, the type of paper or canvas you use affects the texture of the artwork. These are the details you need to consider when mimicking the hand-drawn look digitally.
I remember when I first started experimenting with digital art, I was frustrated that my lines looked so sterile and uniform. It wasn’t until I began consciously mimicking these natural variations that my art started to look more authentic.
Mastering Line Weight Variation
Forget the uniform lines that scream “digital.” Experiment with pressure sensitivity if you’re using a drawing tablet (and you really should be!). Within your art program settings, adjust the pressure curves so that even subtle changes in pressure create noticeable variations in line thickness.
Even without a fancy tablet, you can simulate this effect by manually adjusting the brush size as you draw, or using tools like the “taper” setting in many programs.
Remember to observe real pencil strokes – notice how lines tend to be thicker in areas of shadow and thinner in areas of highlight. Applying this understanding will dramatically improve your hand-drawn aesthetic.
Embracing Imperfection and Texture
Perfection is the enemy of the hand-drawn look! Real sketches and drawings are full of tiny imperfections – wobbly lines, slight overlaps, and uneven textures.
Resist the urge to smooth everything out to a flawless finish. Instead, look for ways to introduce controlled chaos. Use brushes with built-in texture, or overlay texture layers onto your artwork.
Experiment with different blending modes to see how they affect the overall feel. One of my favorite techniques is to scan in real paper textures and use them as overlays.
It adds a subtle, but noticeable, layer of realism.
Brushwork: The Key to a Natural Feel
The brushes you use are crucial for achieving that hand-drawn style. Ditch the default, perfectly smooth brushes and explore options that mimic the irregularities of traditional art tools.
Think about the way a charcoal pencil or a watercolor brush behaves – they leave behind a unique texture and variation in color and opacity. Find digital brushes that emulate these qualities.
When I first started out, I spent hours searching for the perfect brushes. Now, I even create my own by scanning in textures and tweaking the brush settings to get exactly the look I want.
Exploring Charcoal and Pencil Brush Simulations
Many digital art programs offer excellent simulations of charcoal and pencil brushes. These brushes often have built-in texture and pressure sensitivity that allow you to create realistic-looking strokes.
Experiment with different hardness levels and blending modes to achieve a variety of effects. I’ve found that using a slightly textured charcoal brush for shading and a fine pencil brush for details can create a really convincing hand-drawn look.
Watercolor and Ink Wash Effects
Don’t limit yourself to dry media! Simulating watercolor and ink wash effects can add a beautiful, organic feel to your digital art. Look for brushes that have soft edges and varying opacity.
Experiment with layering different colors and blending modes to create depth and richness. One trick I like to use is to create a separate layer for the watercolor effect and then use a clipping mask to confine it to the areas I want it to appear.
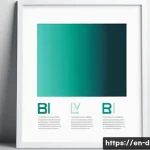
Color Palettes: Evoking Traditional Media
The colors you choose can significantly impact the perceived “hand-drawnness” of your art. Think about the colors typically associated with traditional media – muted earth tones, slightly desaturated colors, and subtle variations in hue.
Bright, saturated colors can sometimes look too “digital,” especially if you’re aiming for a more vintage or classic feel. I remember one time I was working on a piece that just didn’t feel right.
I realized that the colors were too vibrant and saturated. Once I toned them down, the artwork instantly felt more authentic.
Muted and Earthy Tones
Embrace a palette of muted and earthy tones like browns, ochres, grays, and muted greens. These colors evoke the feel of natural pigments and vintage paper.
Avoid overly bright or saturated colors that can detract from the hand-drawn aesthetic. I often start by creating a custom color palette based on a reference photo of a vintage painting or drawing.
It helps me stay consistent and create a cohesive look.
Subtle Color Variations and Gradients
Even within a limited color palette, introduce subtle variations in hue and value. Use gradients and color overlays to add depth and complexity to your artwork.
For example, instead of using a flat brown color for a shadow, try using a gradient that ranges from a slightly lighter brown to a darker, more reddish-brown.
These subtle variations will make your art look more natural and less digitally flat.
Adding Depth and Dimension Through Shading
Realistic shading is crucial for creating a sense of depth and dimension in your hand-drawn digital art. Observe how light interacts with surfaces in real life and try to replicate those effects in your artwork.
Pay attention to the direction of the light source, the cast shadows, and the highlights. Don’t be afraid to experiment with different shading techniques to find what works best for you.
Hatching, Cross-Hatching, and Stippling
These are classic shading techniques used in traditional drawing. Hatching involves drawing parallel lines to create areas of shadow. Cross-hatching involves layering multiple sets of parallel lines at different angles to create darker shadows.
Stippling involves using dots to create tone. These techniques can be easily replicated digitally using textured brushes and a bit of patience.
Simulating Blended Shading with Soft Brushes

For a smoother shading effect, use soft-edged brushes to blend your shadows. Experiment with different blending modes to see how they affect the overall look.
One technique I like to use is to create a separate layer for the shading and then use a “multiply” blending mode to darken the colors below. This allows me to easily adjust the intensity of the shadows without affecting the underlying colors.
Paper and Canvas Textures: The Finishing Touch
The final step in creating a convincing hand-drawn look is to add a paper or canvas texture to your artwork. This texture will add a subtle layer of realism that ties everything together.
You can find a variety of paper and canvas textures online, or you can create your own by scanning in real textures. I personally prefer to create my own textures because it allows me to customize them to perfectly match the style of my artwork.
Overlaying Scanned Textures
This is the easiest way to add a texture to your artwork. Simply find a scanned texture that you like and overlay it onto your artwork using a blending mode like “overlay” or “soft light.” Adjust the opacity of the texture layer to control the intensity of the effect.
Make sure the texture is high-resolution so that it doesn’t look pixelated when you zoom in.
Creating Custom Textures with Noise and Filters
If you can’t find a texture that you like, you can create your own using noise and filters. Start by creating a new layer and filling it with a neutral gray color.
Then, add some noise to the layer using the “add noise” filter. Experiment with different noise levels and distribution patterns to create a variety of textures.
You can also use other filters like “grain” or “texture” to further refine the texture.
Understanding Resolution and File Formats
When creating digital art with a hand-drawn aesthetic, it’s crucial to understand the impact of resolution and file formats. A high resolution will allow you to capture the subtle details of your textures and brushstrokes, while the right file format will ensure that your artwork retains its quality when it’s saved and shared.
I learned this the hard way when I created a beautiful illustration, only to have it look blurry and pixelated when I uploaded it online. Now, I always double-check my resolution and file format before I start working on a project.
Working at High Resolution for Detail
Always work at a high resolution (at least 300 DPI) to capture the details of your textures and brushstrokes. This will ensure that your artwork looks crisp and clear, even when it’s printed or viewed at a large size.
Keep in mind that working at a high resolution will require more processing power, so you may need to upgrade your computer if you’re working with very large files.
Choosing the Right File Format (PNG vs. JPEG)
When saving your artwork, choose the right file format based on its intended use. PNG is a lossless file format that’s ideal for preserving the quality of your artwork, especially if it contains a lot of fine details or transparency.
JPEG is a lossy file format that’s more suitable for photographs and images with smooth gradients. Avoid saving your artwork as a JPEG if you want to preserve the hand-drawn details.
Here’s a table summarizing some of the key considerations for achieving a hand-drawn digital art style:
| Technique | Description | Digital Application |
|---|---|---|
| Line Weight | Varying line thickness to create visual interest and depth. | Pressure-sensitive brushes, manual brush size adjustments. |
| Texture | Adding surface detail to mimic paper, canvas, or other materials. | Textured brushes, scanned textures, noise filters. |
| Color Palette | Using muted or earthy tones to evoke traditional media. | Custom color palettes, desaturation adjustments. |
| Shading | Creating depth and dimension with hatching, cross-hatching, or blended shading. | Textured brushes, soft brushes, blending modes. |
| Resolution | Working at a high resolution to capture fine details. | 300 DPI or higher. |
| File Format | Choosing the right file format to preserve image quality. | PNG for high-quality images, JPEG for web use. |
Wrapping Up
Experimenting with these techniques has really transformed the way I approach digital art. It’s all about being intentional with your choices and understanding the nuances of traditional art. Don’t be afraid to break the rules and find your own unique style. The key is to practice, experiment, and have fun!
Handy Tips and Tricks
1. Invest in a good drawing tablet: A pressure-sensitive drawing tablet is essential for creating realistic line weight variations.
2. Explore different brush packs: There are tons of free and paid brush packs available online that can help you achieve a variety of hand-drawn effects.
3. Use reference photos: Study real sketches and drawings to learn how light interacts with surfaces and how different materials behave.
4. Don’t be afraid to experiment with blending modes: Blending modes can dramatically alter the look of your artwork and help you achieve a variety of effects.
5. Practice regularly: The more you practice, the better you’ll become at creating hand-drawn digital art.
Key Takeaways
Achieving a hand-drawn aesthetic in digital art requires a combination of technical skill and artistic vision. Mastering line weight variation, embracing imperfections, and using the right brushes and textures are all essential for creating realistic-looking artwork. Remember, the goal is to replicate the nuances of traditional art within the digital realm. Enjoy the process!
Frequently Asked Questions (FAQ) 📖
Q: What software or tools are best for creating digital art that mimics hand-drawn styles?
A: Okay, so I’ve been experimenting a lot with this, and honestly, there isn’t a single “best” tool – it really depends on your preferences and the specific look you’re going for.
But personally, I’ve found that Adobe Photoshop and Procreate are fantastic starting points. Photoshop gives you incredibly powerful brushes and effects, allowing you to simulate textures like paper or canvas.
Procreate, on the other hand, is super intuitive and works wonderfully on an iPad with an Apple Pencil. The responsiveness is amazing, it almost feels like drawing on real paper.
I’ve also heard great things about Rebelle, which focuses specifically on realistic painting and drawing simulations, but I haven’t had a chance to try it out myself yet!
Don’t underestimate free options like Krita either – it’s surprisingly powerful and has a very supportive community.
Q: What are some key techniques to make digital art look convincingly hand-drawn?
A: Ah, the million-dollar question! For me, it’s all about embracing imperfection. One of the first things I do is avoid using completely straight lines.
Even if you’re drawing something like a building, give the lines a slight wobble – it instantly makes it feel more organic. Also, experiment with different brush settings!
Instead of using a perfectly smooth brush, try one with a textured edge or a slightly uneven flow. I love playing with pressure sensitivity to vary the line weight, just like you would with a real pen or pencil.
And don’t forget about adding subtle textures – things like scanned paper textures or noise layers can really sell the hand-drawn effect. Another tip – study the work of artists you admire!
Pay close attention to their line work, shading techniques, and the way they use textures. It’s a great way to learn new tricks and develop your own unique style.
Q: Are there any specific brush settings or resources I should look for to achieve a hand-drawn aesthetic in digital art?
A: Absolutely! The good news is that there are tons of fantastic brush packs and resources available online. For Photoshop, I recommend searching for “sketching brushes” or “charcoal brushes” – these often come with built-in textures and imperfections.
For Procreate, check out resources like the Procreate Marketplace or Gumroad. You can find everything from pencil brushes to ink brushes to watercolor brushes, often created by professional artists.
When you’re customizing your own brushes, pay attention to settings like “jitter,” “spacing,” and “texture.” Adding a little bit of jitter to the position or size of the brush can create a more organic look.
Increasing the spacing between brush strokes can simulate the effect of a dry brush. And of course, experiment with different textures to add depth and realism to your artwork.
Don’t be afraid to tweak the settings to your liking and create your own unique brush library! I’ve found that the best brushes are the ones I’ve customized myself to fit my specific style.
📚 References
Wikipedia Encyclopedia
구글 검색 결과
구글 검색 결과
구글 검색 결과
구글 검색 결과
구글 검색 결과